Fill and Sign Toolbar help
Use Fill and Sign to sign, insert Free Text, insert a Cross, insert a Tick, insert a Dot, Rubber Stamp, or insert a Date.
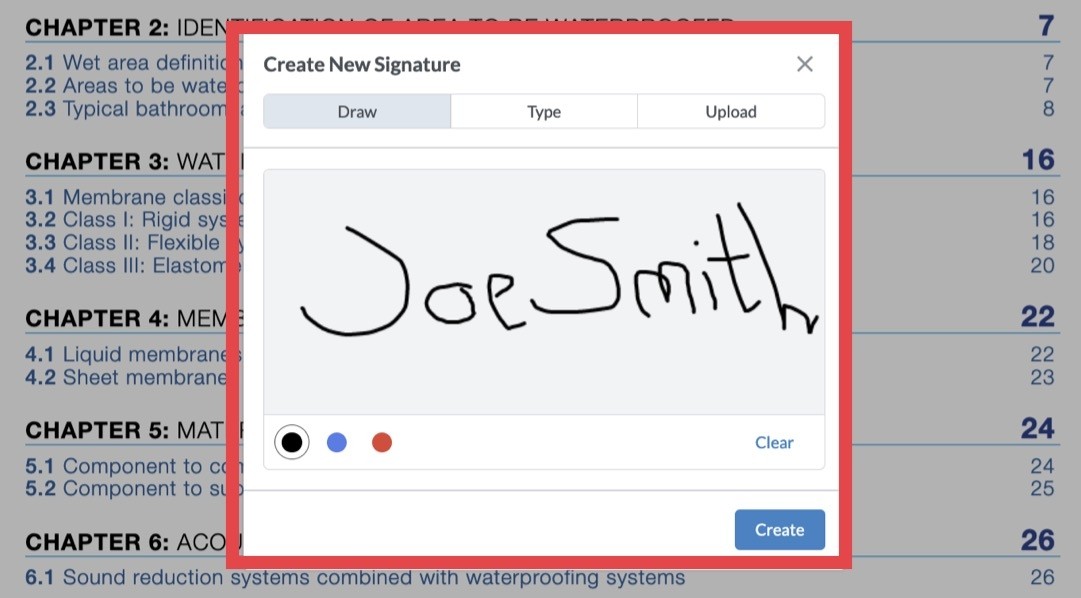
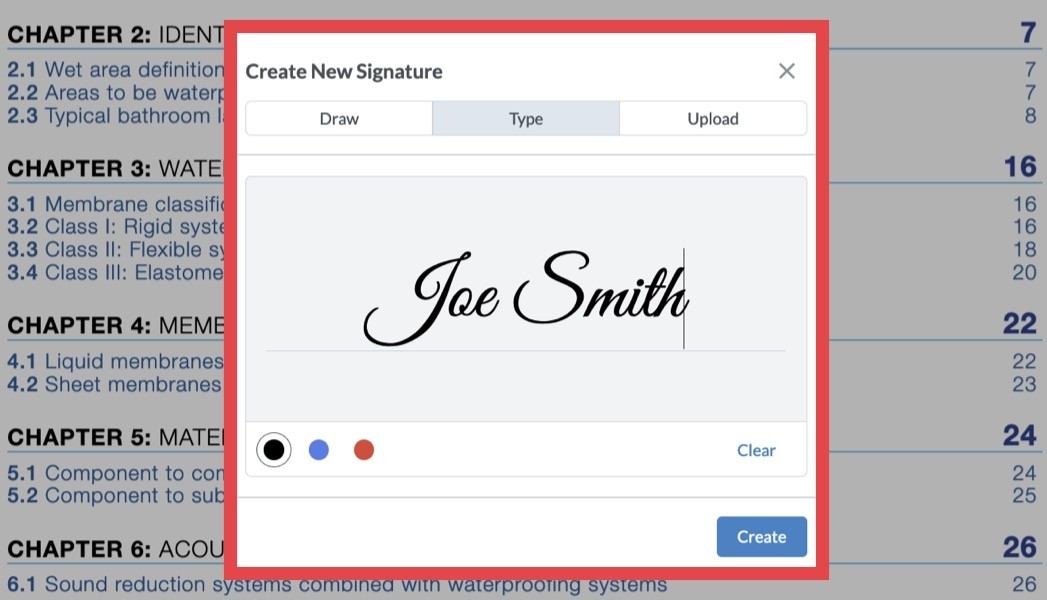
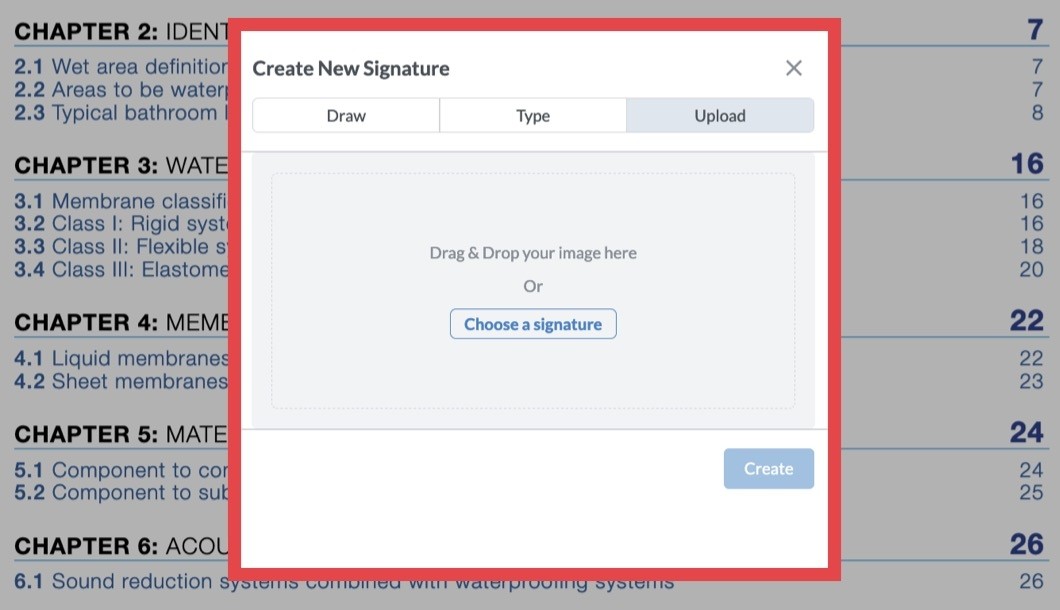
1. To sign a document select the Signature tool and click Add New Signature.

2. In the popup window you can choose to draw a signature, type a signature, or upload an image. Once you’ve set your signature, click Create, and the signature can be inserted in the document.
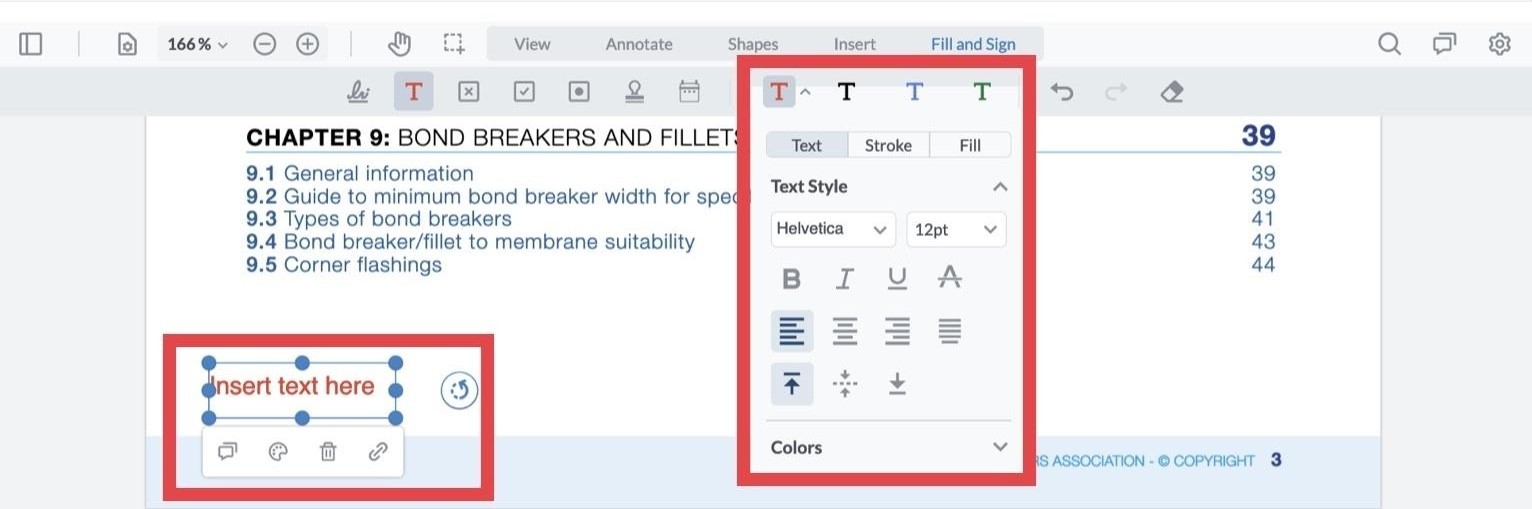
3. To add a free text box to the document select the Free Text tool and click on the document where you want to place the box. Drop down options will appear under the box, with the choice to edit the text or change the font colour.
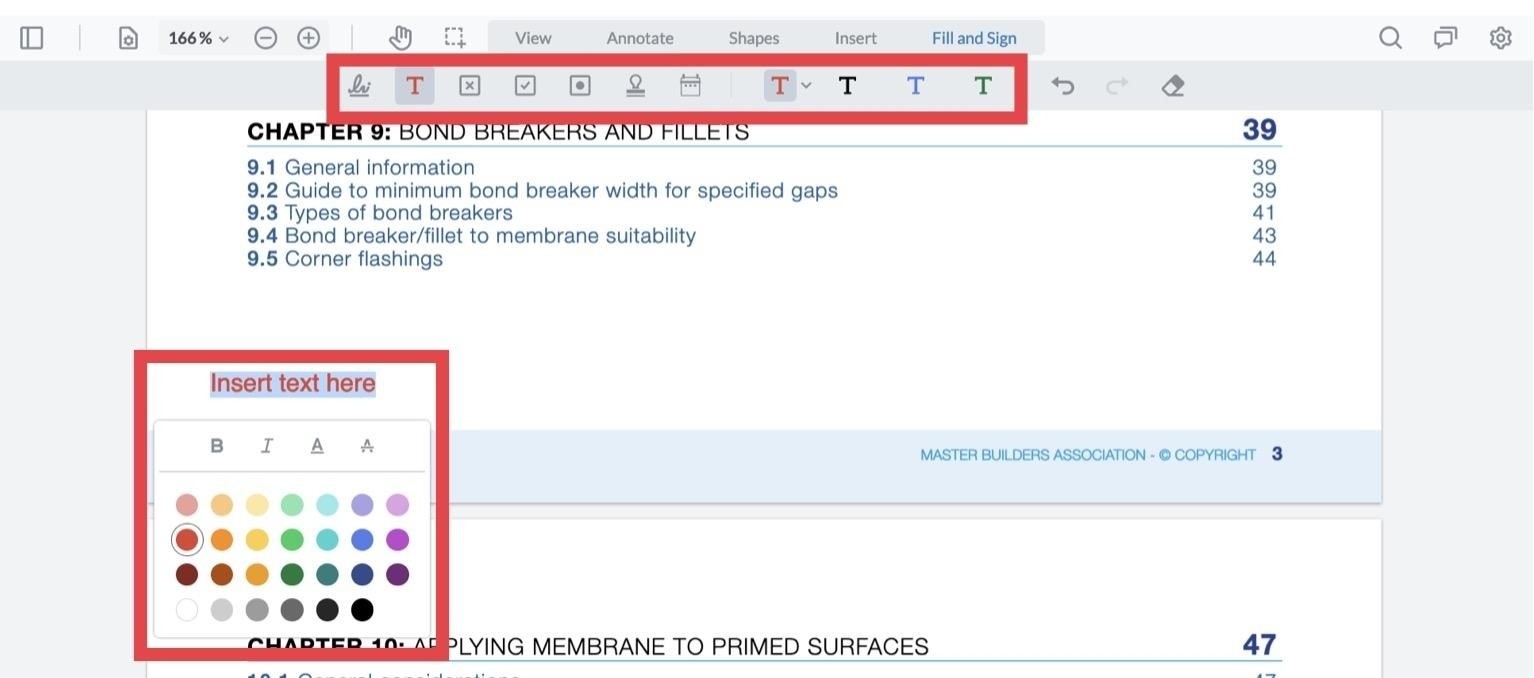
4. To change the text box’s font, font size, alignment, formatting, font colour and opacity, or fill the text box, select the Free Text box tool dropdown.
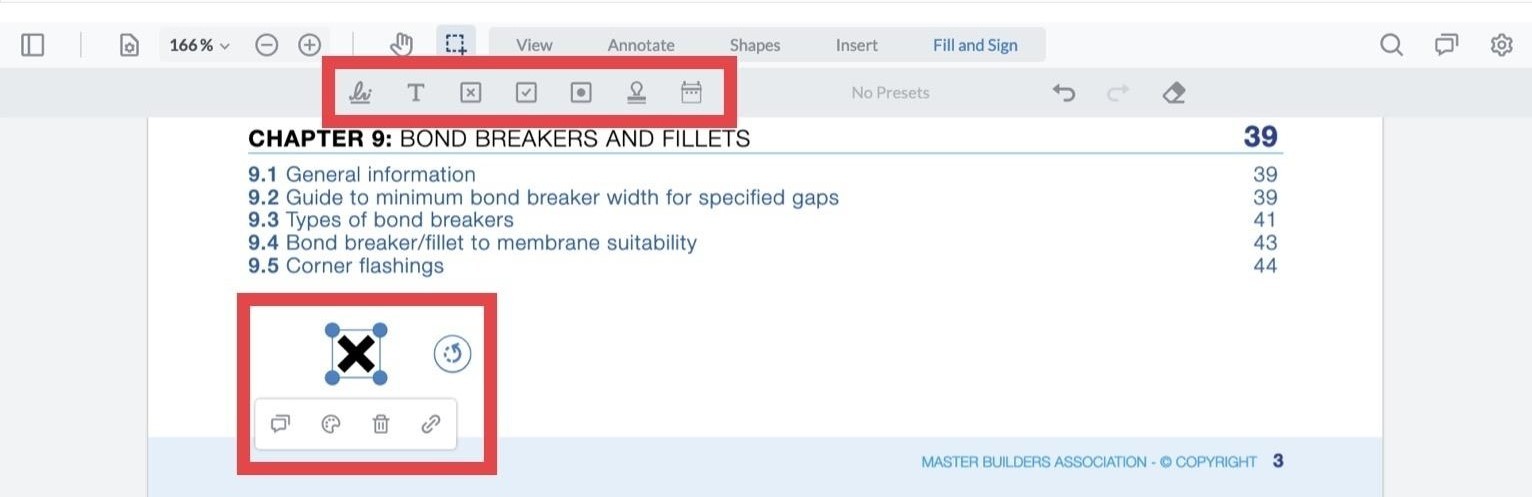
5. To add a cross to the document select the Cross tool. Click on the document to add a cross.
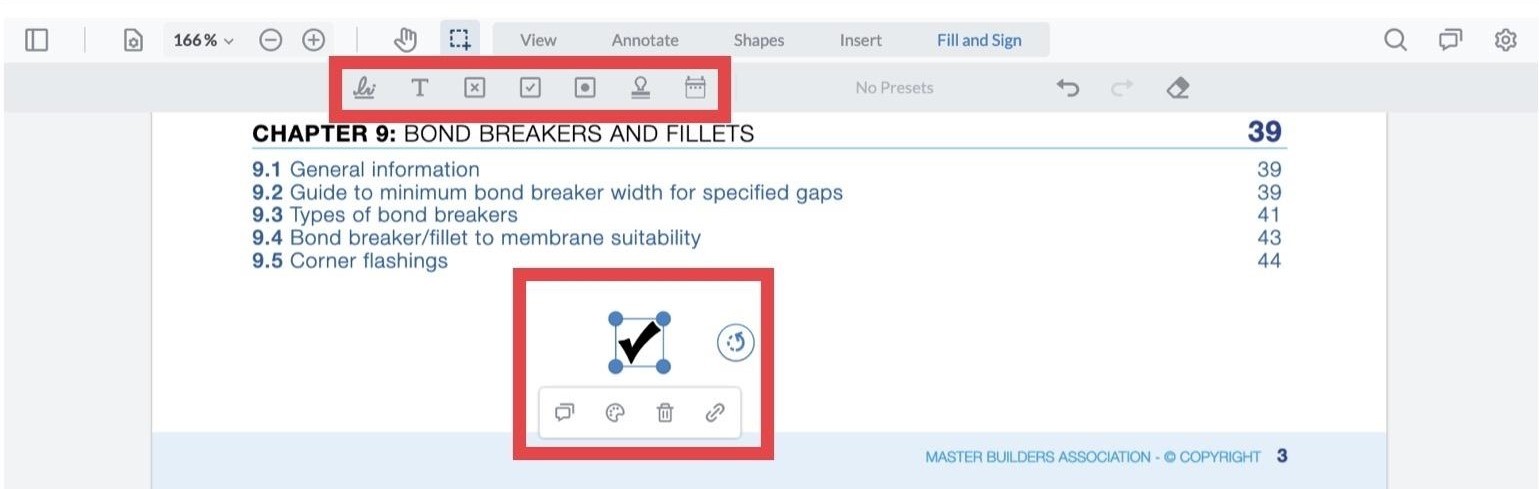
6. To add a tick to the document select the Tick tool. Click on the document to add a tick.
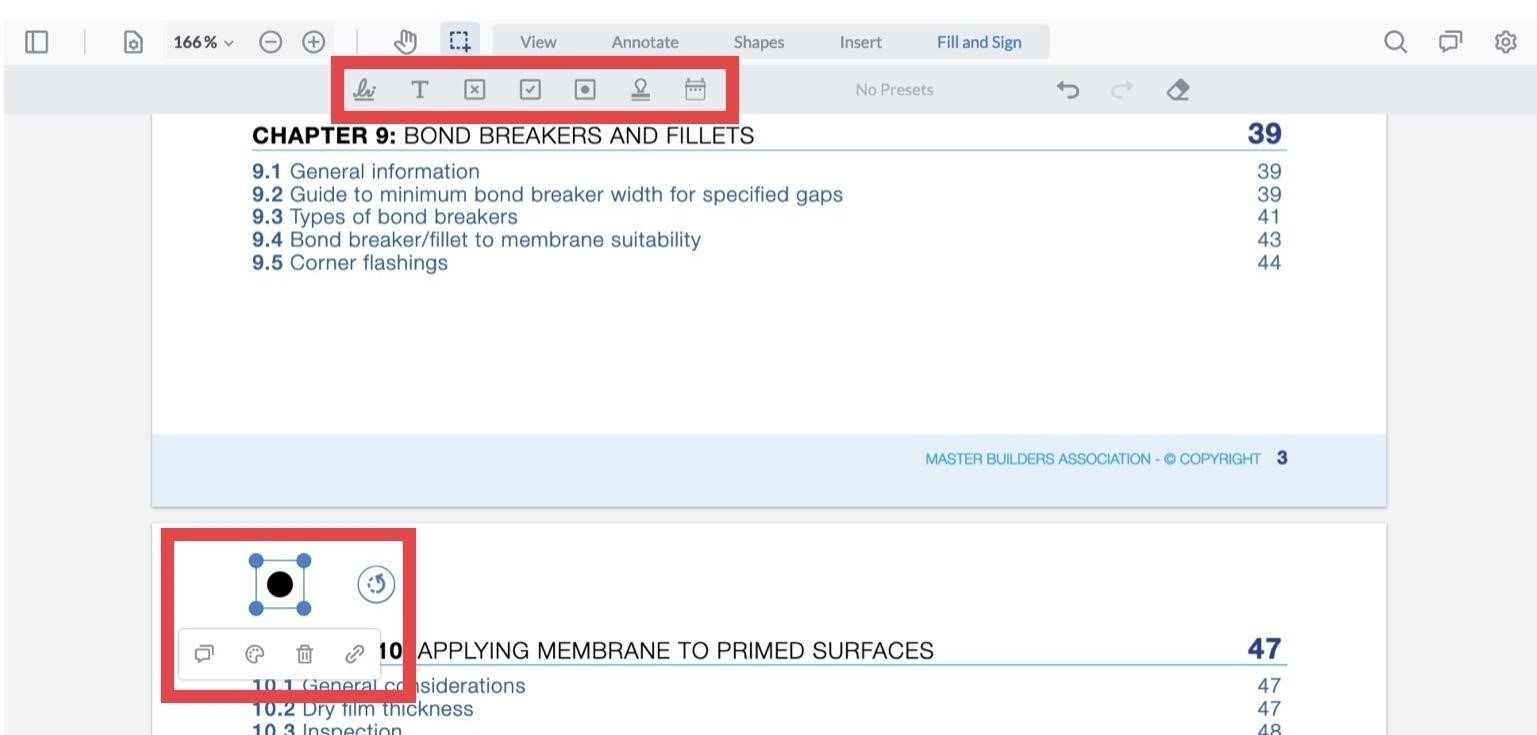
7. To add a dot to the document select the Dot tool. Click on the document to add a dot.
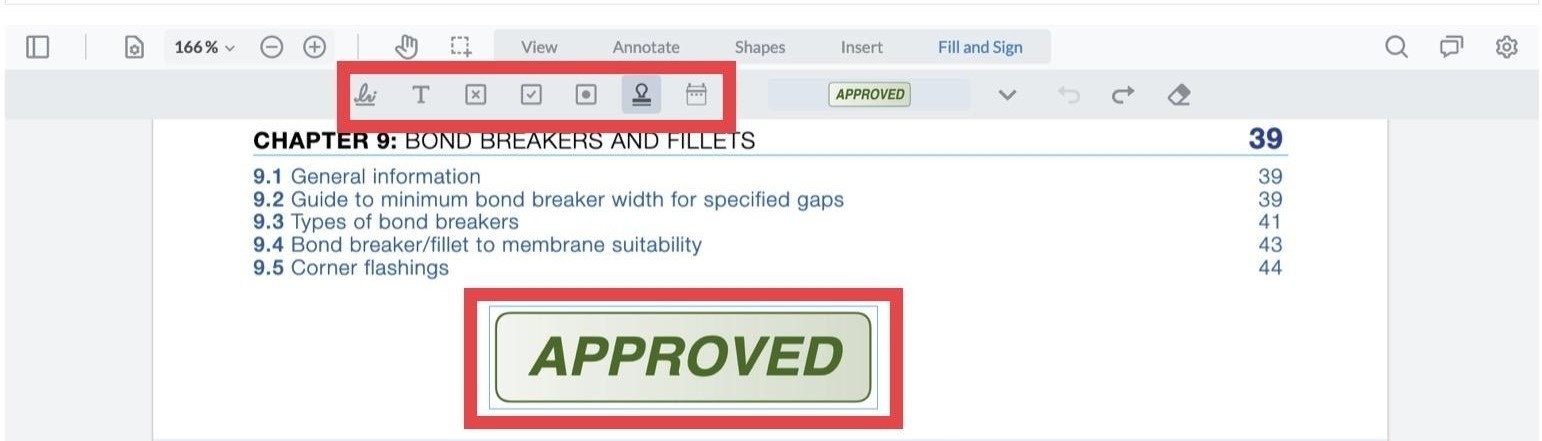
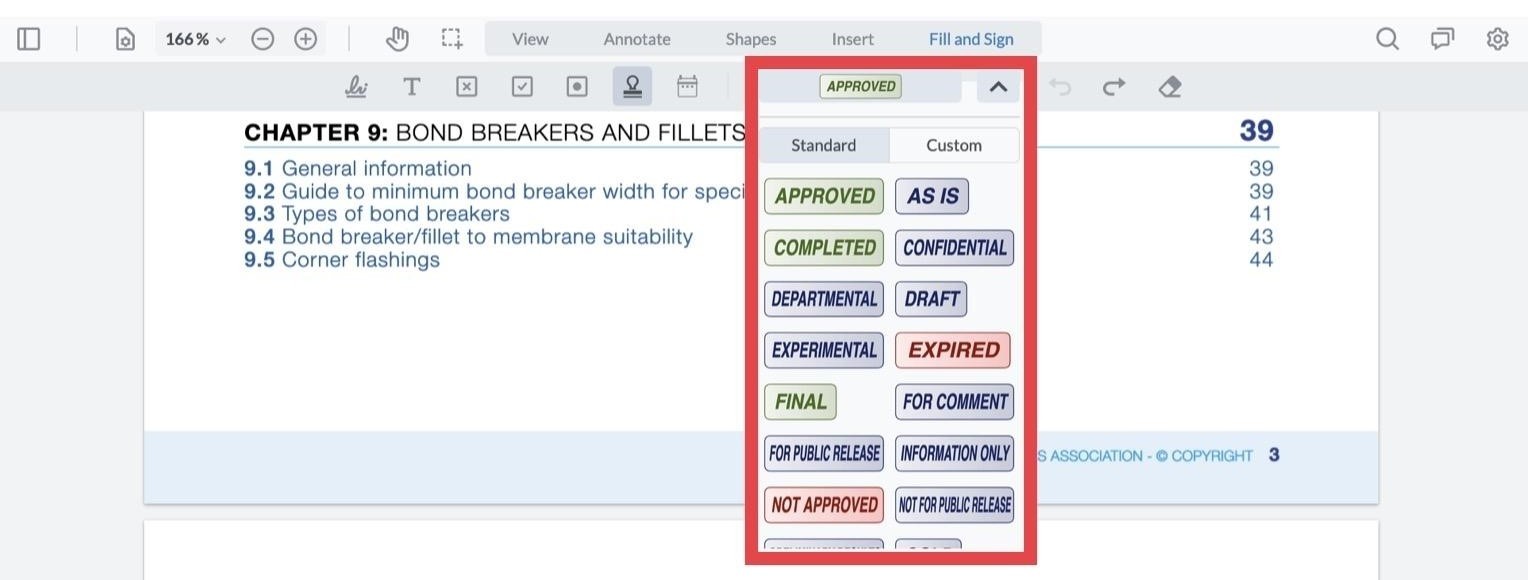
8. Use rubber stamp to insert pre-set images or create your own custom stamp. To insert a rubber stamp select the Rubber Stamp tool, choose standard and select from the list.
9. To insert a customised rubber stamp, select Custom and create new stamp. In the popup window write your text and choose a colour. Customised stamps can be timestamped with username, date, and time.
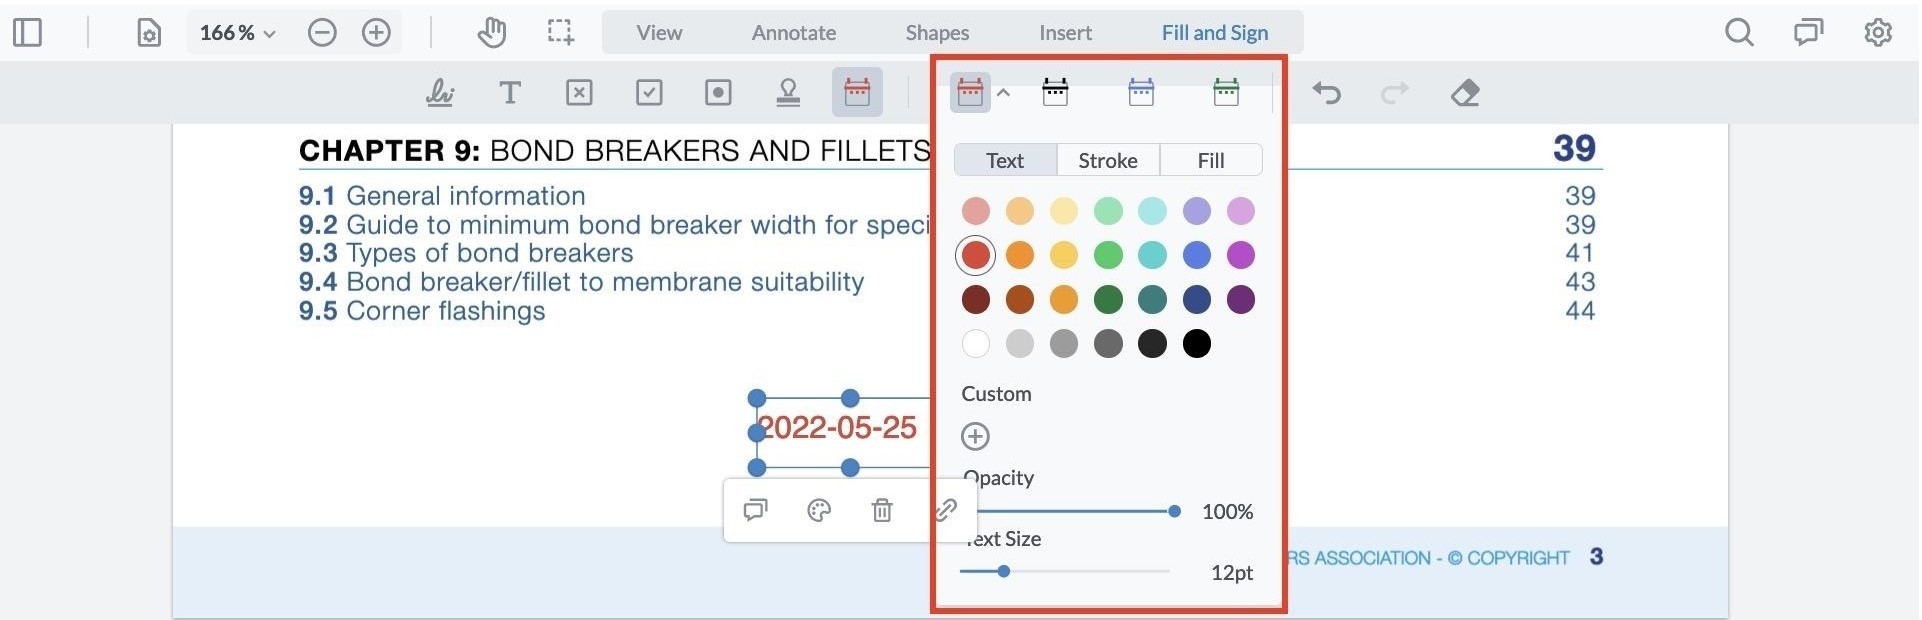
10. To add the date select the Date tool. Click on the document to add the current date. To change the date, double click on the text to make adjustments. Select custom to create your own colour.
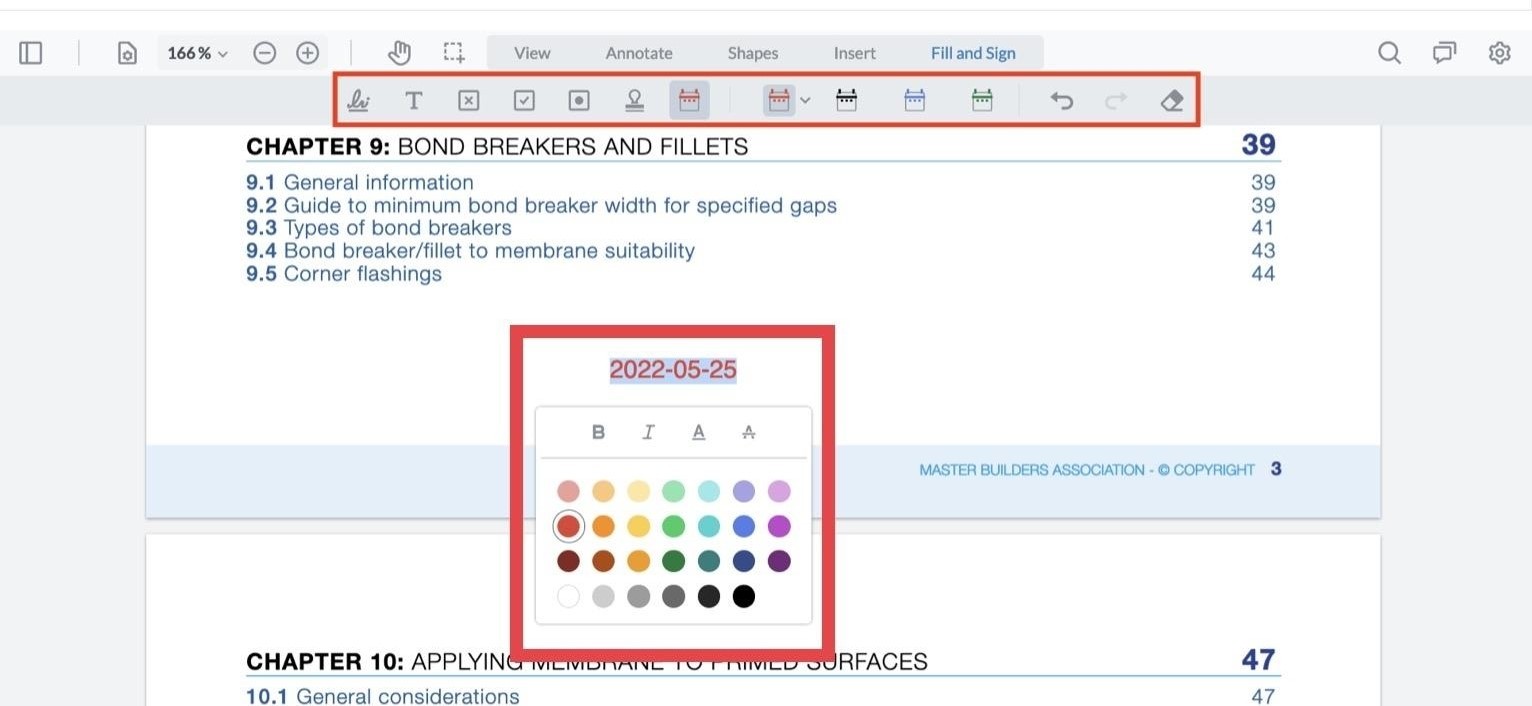
11. Select custom to create your own colour.